QTPS3 T-Connector Plug & Socket
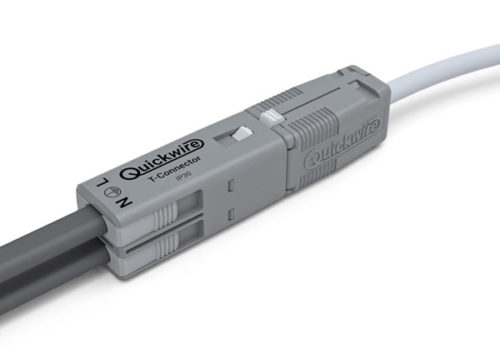
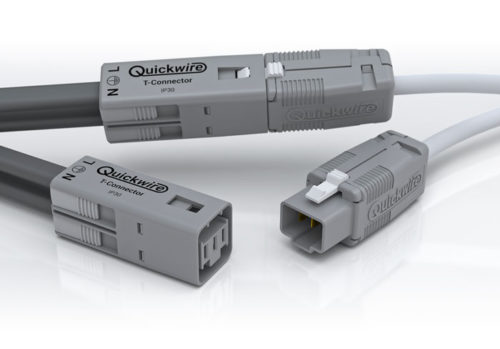
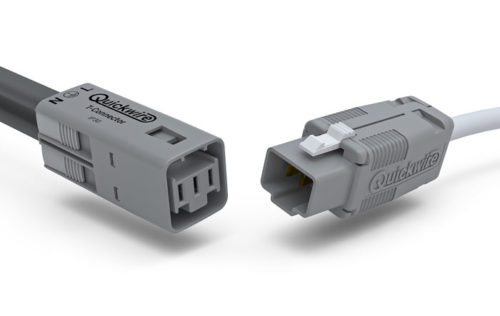
New pluggable T-Connector for flexible cable
The plug-in T-Connector is a 3 pole plug and socket: The plug accepts flexible cable and the socket consists of two Quickwire solid core twin and earth, loop in loop out connections.
The T-Connector offers the same dramatic time-savings and ease of use as all of our Quickwire junction boxes.
- Compact – fits through a 30mm diameter hole.
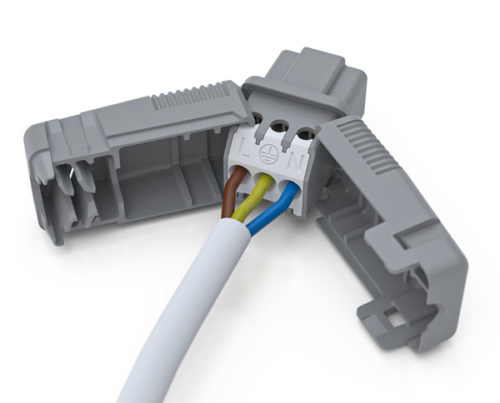
- One piece plug moulding simply snaps shut with cord grip.
- Easy disconnection for maintenance and testing.
- Dramatic time saving on site.
- Pre-flexed plugs available. Contact us for details.
- Designed and manufactured in Great Britain.
Plug Specification
| Rating Supply Voltage | 250V~ 16A (Overcurrent protection limited to 16A) |
|---|---|
| Poles | 3 – pole |
| Cable entry | 1 x Flexible (Class 5/6 conductors) or 1 x Rigid (Class 1 conductors) |
| Conductor Size | 0.5mm² – 1.5mm² |
| Termination | Screw terminals |
| Cord Grip size | Max. 8.Ø Min. 4.0Ø |
| Dimensions | 23mm x 24mm x 60mm (fits through a 30mmØ hole) |
| IP Rating | IP20 (When plugged in) |
| Rating Supply Voltage | 250V~ 16A (Overcurrent protection limited to 16A) |
|---|---|
| Poles | 3 – pole |
| Cable entry | 1 or 2 x Twin & Earth (CPC) Solid cores, 1.0mm² – 1.5mm², Class 1 conductors |
| Termination | Utilizes rapid Quickwire push in technology |
| Cord Grip | Fully automatic |
| Conductor Size | 1.0mm² – 1.5mm² Twin & Earth (CPC) Solid cores, Class 1 (conductors) |
| Dimensions | 23mm x 24mm x 60mm (fits through a 30mmØ hole) |
| IP Rating | IP30 |
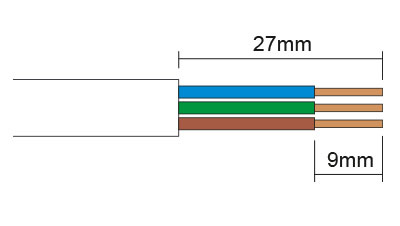
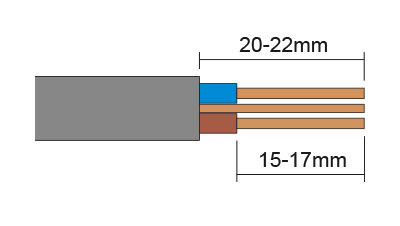
Socket Installation
Twin & Earth cable stripping guide for a Quickwire Socket.
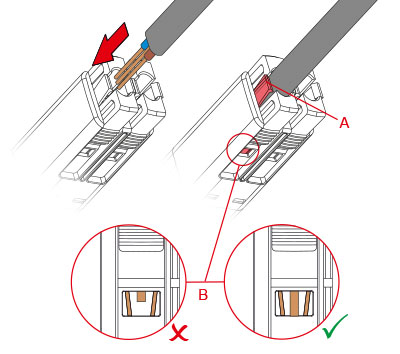
1. Align prepared cable and guide into outlet, until resistance is met. At this stage check sheath is within cord grip (A) and conductors are visible through windows (B).
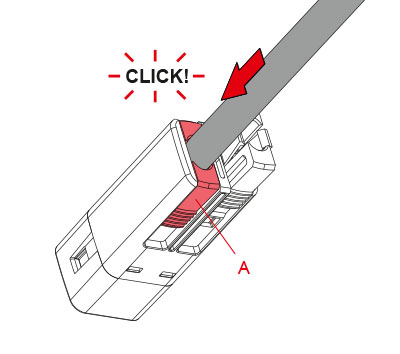
2. Continue to push cable until shuttle snaps into place (A). Repeat process for other outlet or push in unused shuttle.
Plug Installation
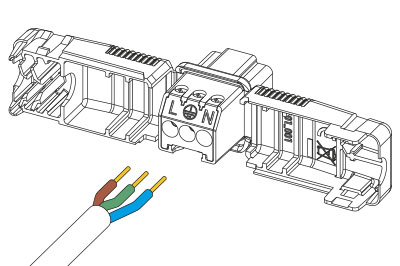
1. With plug covers fully open, terminate cable.
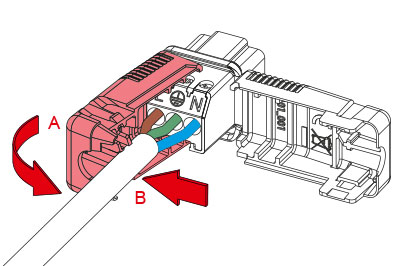
2. Close just cover side which includes cord grip (A), then push cable firmly into cord grip (B).
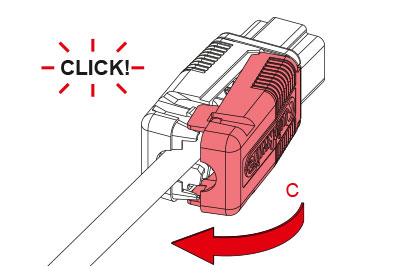
3. Bring other cover side around to meet and press both halves together until they click (C). Check both latches have engaged.

